
How to Set Up Easy Karaoke at Home
Key Gear Setup
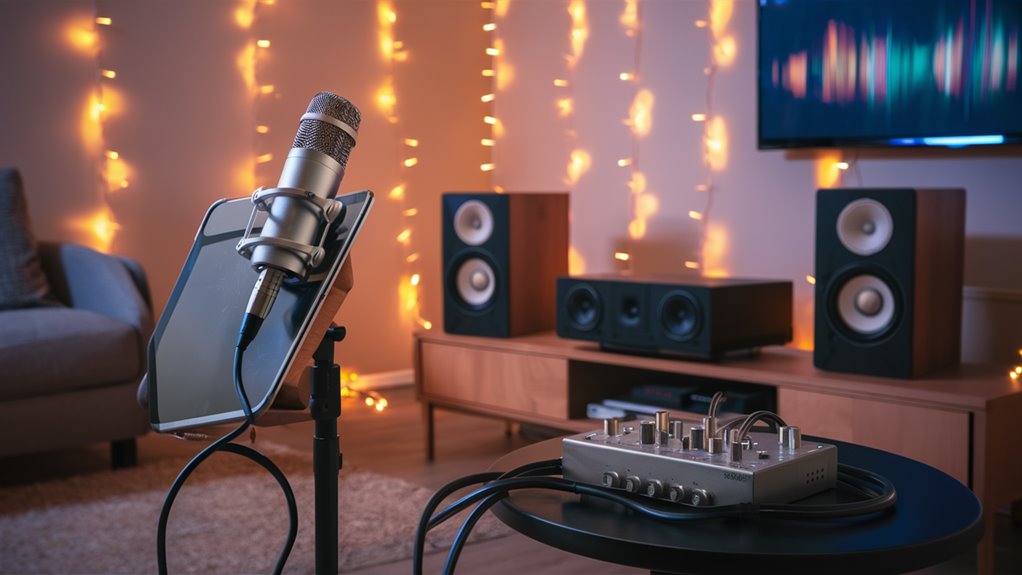
Start with a high-end mic like the Shure SM58, hook it up to a good 4-channel mixer such as the Yamaha MG10XU. Pair this with large speakers with 8-inch woofers that can handle 100W or more.
Sound Settings and Room Setup
Use top-quality XLR cables and set your mixer’s EQ levels from 250-500Hz to 2-4kHz for clear vocals. Set your speakers at 45-degree angles, about 8-12 feet away from your singing spot. Install simple sound panels to keep the sound clean.
Songs and Screen
Make your karaoke fun with good services like Karafun or SingKing, shown on a big screen of at least 40 inches. These give you many songs and nice music.
Technical Details
- Mic: Top dynamic vocal mic see more
- Mixer: 4-channel sound board with USB
- Speakers: Strong speakers with 8-inch parts
- Wires: Best XLR links
- Screen: Big HD screen (40″ or more)
- Songs: Paid karaoke app sub
Key Karaoke Gear Guide
Main Parts for Great Sound
A good DIY karaoke setup needs some key parts for top sound.
These are a mic, sound mixer, speakers, screen, and music player.
Choosing a Mic
The dynamic cardioid mic is top for karaoke. The Shure SM58 is great at blocking outside sound and lasts well even with lots of use, making it a usual choice for live singing.
Sound Mixer Equipment
A small 4-channel mixer with built-in digital effects is key. Top choices include:
- Yamaha MG10XU
- Behringer Xenyx Q802USB
These mixers are good for connecting to your computer, letting you adjust sound just right.
Speaker Needs
Powered speakers with 8-inch woofers give top sound. Key features:
- At least 100 watts per channel
- Strong bass
- Loud enough for live singing
Display and Playing Music
Karaoke music options include:
- Laptops
- Tablets
- Phones
Your music player should have HDMI out to connect to your screen.
A big screen of at least 40 inches makes lyrics easy to see.
Needed Wires
Cables you need to set up your system:
- XLR cables for the mic
- TRS or RCA cables for sound
- Power cords for all devices
- HDMI cables for the screen
Picking Your Karaoke Music
How to Choose the Best Karaoke Music
Top Karaoke Music Choices
Karaoke DVDs and CDs are great for sound and reliability. They have separate song and music tracks, giving great audio.
They need space and new choices now and then but work without the net.
Online Music Services
Big karaoke sites like Karafun and SingKing have lots of songs with good mixing tools. They offer:
- Always updated song lists
- Tools to change music key
- Works on many devices
- Quality music
- Good sound mixing
Streaming Songs
YouTube karaoke channels are an easy choice for fun singers. Top channels are:
- Sing King Karaoke
- KaraFun
- Karaoke Version
Best Ways to Sing
When using online songs, do these tips well:
- Have songs ready offline
- Check the channel is real and sounds good
- Have a backup music source
- Watch for copyright rules
- Make sure your net works well
For the best sound and safe singing, mix different music sources to have a full karaoke song system that fits all needs and keeps you ready for any tech issues.
Setting Up Sound
Complete Sound Setup Guide for Karaoke
Needed Gear
Setting up a top karaoke sound system needs careful planning of signal paths and parts that work well together.
Start with strong speakers or an amp and speaker set that can handle at least 100 watts per channel for the best sound.
A great mixer is the heart of it all, letting you mix music and mic sounds well.
Choosing and Connecting Mics
Dynamic cardioid mics with XLR links are best for karaoke. The Shure SM58 and Sennheiser e835 are top picks for clear singing.
Connect these to your mixer’s balanced XLR inputs using good shielded cables. For digital music from computers or phones, use the mixer’s special line inputs with the right adapters to match.
Keeping Sound Clean
Where to Put Speakers
Place main speakers forward from where the mic picks up sound to keep feedback low. Use smart sound panels in the right spots to control echoes and sound waves.
Handling Sound Signals
Make your sound good by:
- Lowering sounds between 250-500Hz
- Turning down tricky bands at 2-4kHz
- Starting gain at zero
- Setting main sound levels for clean sound
These steps give top sound while keeping the singing clear and free from feedback.
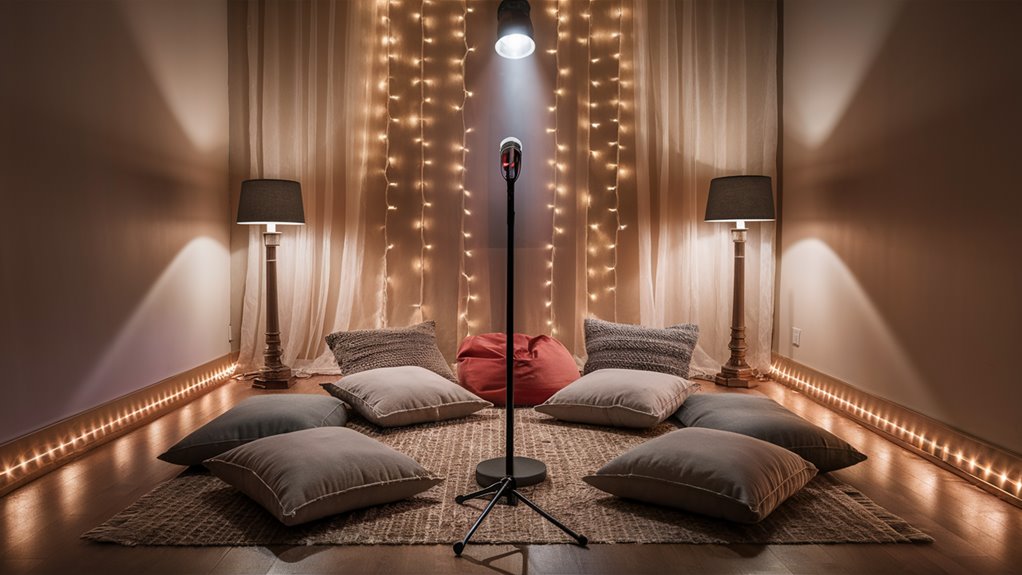
Set Up Your Singing Spot
Making Your Singing Area: The Best Layout Guide
Key Parts of the Layout
Designing your singing spot needs three key parts: where the stage is, how people sit, and where to treat sound.
Put your singing spot against the room’s short wall to spread sound well and keep echoes low.
Make a small stage area, marked with tape or a special platform.
Best Way to Arrange Seats
Make a good listening spot 8-12 feet from the main speakers, with chairs in a half-circle facing the stage.
This seat plan makes sure up to 15 people can hear well and see the singer.
Good Sound Panels
Walls and Corners
Put 2-inch sound panels where sound bounces first, about 4 feet up the side walls.
Bass traps in corners help control deep sounds.
If your floor is hard, lay a big rug between where you sing and where people sit to cut down on echoes.
Ceiling Panels
Hang cloud panels right over the singing area to handle sound bouncing up and down and make singing clearer. This wraps up your room’s sound plan, making a pro-level singing space.
Check and Fix
Checking and Fixing Guide for Best Karaoke
Test Your Sound Path
Start with a full sound path check to be sure of good quality.
Test every link from the mic input through the mixing board to your speaker output. This careful check spots problems before they mess up your singing.
Manage Sound Levels
Keep sound levels great by setting mic input around -12dB for a good balance.
Stop sound feedback by:
- Lowering monitor sound
- Moving speakers out of the mic’s range
- Adjusting EQ to get rid of bad frequencies
Best Wireless Mic Setup
For wireless mics, make sure:
- Put in fresh batteries
- Clear line-of-sight between sender and receiver
- Pick frequencies that don’t clash
- Watch signal power often Flickerwhirl Blackjack
Fixing Common Problems
Fix sound issues fast:
- Stop buzzing and noise by checking all grounding
- Fix delay by adjusting buffer size
- Make sure video is in sync by checking HDMI links
- Turn on TV’s “game mode” to cut lag
Keep Track of Fixes
Keep a detailed fix log with:
- What went wrong
- What you did to fix it
- Settings used
- How you set up your system
This helps you solve problems fast and keeps your sound great all the time.